A simple guide to Pagination in React
Let’s say you want to display some records in the form of a table. Normally, it would not be a problem. But what if the number of records is large, like 100 records. Can you display all of it on one page? Of course, you can. However, it would not be a very good user experience.
Instead, you could divide the table into pages and display a subset of the records on one page. This means that instead of displaying all 100 records, you could have 10 pages with each page showing 10 records.
Here’s what a table looks like with and without pagination.

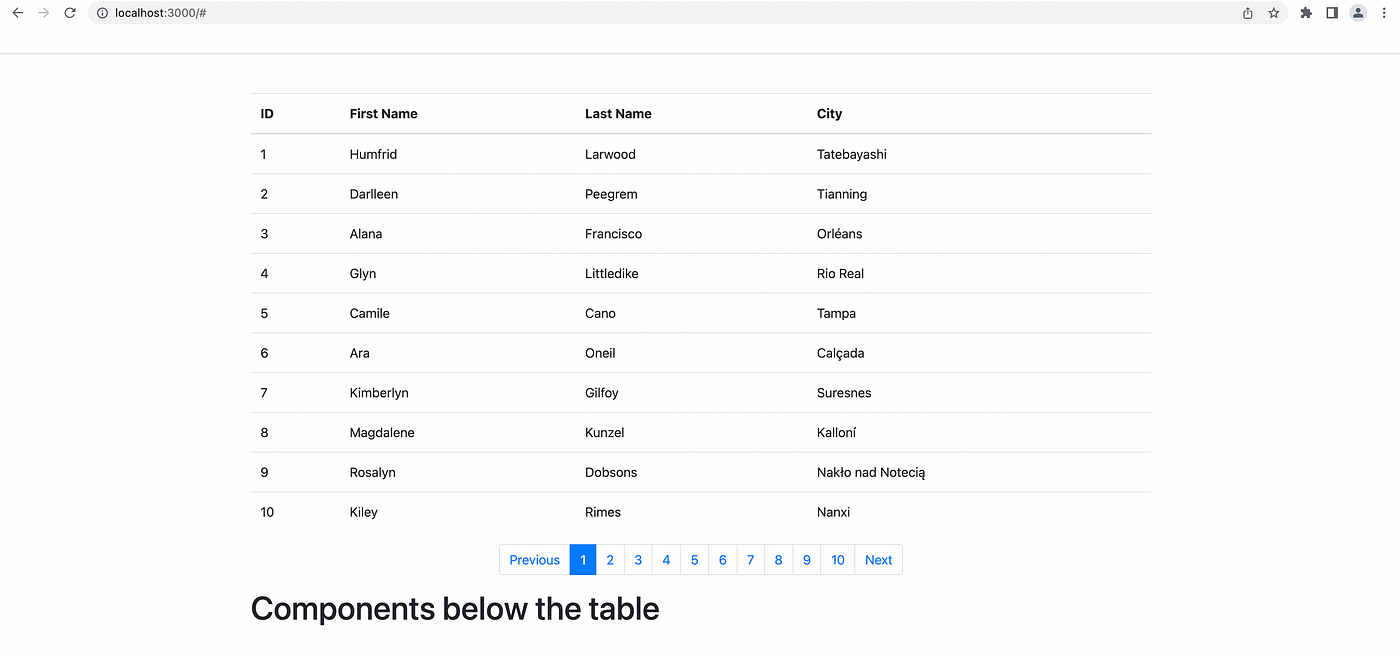
In the first instance, a user would have to scroll down multiple times to access any components after the table which is not a good user experience. Notice the difference with pagination in the second instance, it provides a much better user experience.
Now that you know the importance of pagination, it’s time to show you how to implement it in React. You only need to know the basics of React to understand this post.
Setting Up
Before starting the project, install the ReactJS Code Snippets Extension which increases your development speed for any React project.
Now, create the React application.
create-react-app simple-react-paginationAfter creating the application and deleting redundant files, the folder structure looks like this.

For this project, I have used Bootstrap, so add the following line inside the <head> tag of the index.html file. This will allow you to use bootstrap classes in the project.
<link href="https://cdn.jsdelivr.net/npm/bootstrap@5.1.3/dist/css/bootstrap.min.css" rel="stylesheet" integrity="sha384-1BmE4kWBq78iYhFldvKuhfTAU6auU8tT94WrHftjDbrCEXSU1oBoqyl2QvZ6jIW3" crossorigin="anonymous"> Alternatively, you can download the bootstrap source files from here.
To populate the table, you need some data. I have used randomly generated data for this project. Visit Mockaroo to generate mock data with the fields of your choice. Generate the data in JSON format and store it in the public folder of the project.
Fetching the Data
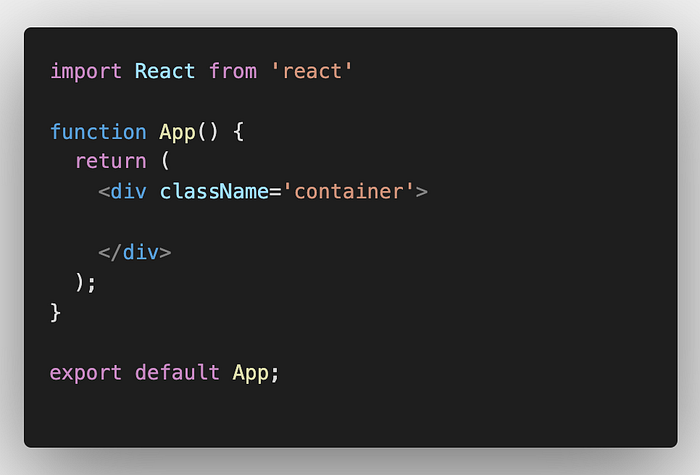
Let’s start with the App.jsx file. This will hold all your components as well as the logic for fetching the data and dividing it for pagination.
Now, add the following two states to the App component.
// To hold the actual data
const [data, setData] = useState([])const [loading, setLoading] = useState(true);
The loading state tells you if the data has been fetched or not. It might take time for all the data to load, especially when you are fetching from a backend database. Until then the loading state is set to true which allows us to display a Loading message on the screen until the data gets fetched.
I have used Axios for fetching the data. Axios allows you to make HTTP requests and get responses from the endpoint. Run this script to install Axios.
npm i --save axiosNow, to fetch the data, use the get function. It takes a URL as a parameter and makes a get request to it. Files in the public folder are stored on the same server as the application i.e. http://localhost:3000/MOCK_DATA.json.
You can also use the file name but only if you are on the http://localhost:3000/ route and not on any child route.
useEffect(() => { axios.get('MOCK_DATA.json') .then(res => { setData(res.data); setLoading(false); }) .catch(() => { alert('There was an error while retrieving the data') })}, [])
The get function returns a Promise, as fetching data is an asynchronous operation. So, write the subsequent actions inside the then block which executes only after you get the full response. Once the fetching is done, load the data into the state and set loading as false. Also, implement the catch block to handle errors.
The data needs to be fetched as soon as the component loads, so the fetching logic is written inside a useEffect.
Displaying the data
Create a file Records.jsx, type rafce, and press enter. It will generate the necessary code to create the Records component (thanks to the Snippets extension).
The table, that holds all the records, will be created inside this component.

As shown above, the data needed to populate the table is passed down from the App component as props. The bootstrap class table provides the necessary styling.
Pagination
So far, the table shows all the hundred records on one page which, as mentioned before, leads to a terrible user experience. Pagination is implemented to improve this.
Deciding the states
In pagination, you can choose how many records are to be displayed on a single page, according to which the number of pages is decided. You also need to keep track of the page number the user is on. So, add these two states to the App component.
// User is currently on this page
const [currentPage, setCurrentPage] = useState(1);// No of Records to be displayed on each page
const [recordsPerPage] = useState(10);
Records to be displayed on each page
Now, you need the indices of the first and last record on the current page.
const indexOfLastRecord = currentPage * recordsPerPage;const indexOfFirstRecord = indexOfLastRecord - recordsPerPage;
Let’s take an example, suppose you are on page 17 and you display 10 records on each page.
So, indexOfLastRecord = 17 * 10 = 170 (The index of last record on page 17 is 169 as the array is zero-indexed, but you don’t need to subract one, reason you will find out soon) and indexOfFirstRecord = 170–10 = 160.
Now, take a subset of the data array with the indices calculated above using the slice function of JavaScript.
// Records to be displayed on the current page
const currentRecords = data.slice(indexOfFirstRecord,
                                    indexOfLastRecord);
The range specified in the slice function is exclusive of the last index, so taking the above example, slice(160,170) will return records from index 160 to 169. This will be passed down to the Records component as props so that the table will only display the records on the current page.
Calculate the number of pages.
const nPages = Math.ceil(data.length / recordsPerPage)Use the ceil function to fit the remainder of the records on a new page if the total number of records is not evenly divisible by recordsPerPage.
Pagination Component
Create a new component named Pagination. The above variables are passed down as props to the Pagination component.
<Pagination
    nPages = { nPages }
    currentPage = { currentPage }
    setCurrentPage = { setCurrentPage }
/>
Inside the Pagination component, create an array that holds all the page numbers from 1 to nPages. Here are several ways to create an array from 1 to N in JavaScript, this is one of them.
const pageNumbers = [...Array(nPages + 1).keys()].slice(1)Now, create a container to display the page numbers and the page controls. I have used Bootstrap classes for this purpose.
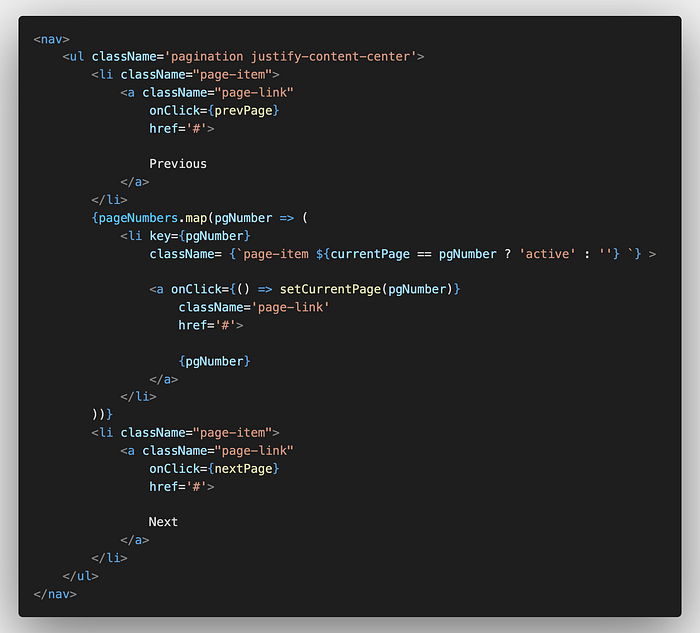
It should look like this:

When you click on any page number, it sets the current page to that number and the table shows the records on that page. Now, implement the nextPage (increase page number) and prevPage (decrease page number) functions.
const nextPage = () => {
    if(currentPage !== nPages)
        setCurrentPage(currentPage + 1)
}const prevPage = () => {
    if(currentPage !== 1)
        setCurrentPage(currentPage - 1)
}
If you are already on the last page, you cannot go to the next page, similarly, you cannot go to the previous page if you are on the first one, so add the respective conditions.
That’s all you need to implement simple pagination in React.
Other implementations
There are multiple ways of implementing pagination, I have shown you one of them. In some cases, fetching complete data from the backend is not a good idea. If there are thousands of records in the database, it would take a lot of time to fetch all of them which again, compromises the user experience.
So, you can implement pagination on the backend side itself and fetch the data one page at a time. Here too, you may have to implement some form of caching as you do not want the application to fetch the data again when you go to the previous page.
Also, in the pagination component, displaying all the page numbers is often not a good idea. So, you can just display 1–3 page numbers at a time that keep changing as you traverse through the pages.
You can find this project on Github.
Conclusion
Pagination helps you to display a large number of records and improve the user experience. It also helps in optimizing the application by only fetching a subset of data at one time. I have shown you a simple way of implementing pagination in React. I hope you are able to implement the same in your upcoming projects.
If you are unable to understand the content or find the explanation unsatisfactory, comment your thoughts below. New ideas are always appreciated! Give a few claps if you liked this post. Subscribe and follow me for weekly content. Also, make sure to check out my other posts. Till then, Goodbye!!