Deploying a Vite React TypeScript app to Github Pages using GitHub Actions, Jest, and pnpm— As a pro
Introduction
I have seen many configurations explaining how to use GitHub Actions to deploy your Vite React website. GitHub and Vite have their own, which is cool.
Nonetheless, if you want to customize what is shown in their documentation, sometimes it is not as straightforward. Let’s say we don’t want to use npm rather pnpm or yarn. Also, we would probably want to cache dependencies and test and abort deployment if the tests fail—because why not avoid disaster?
Setting up the project on GitHub
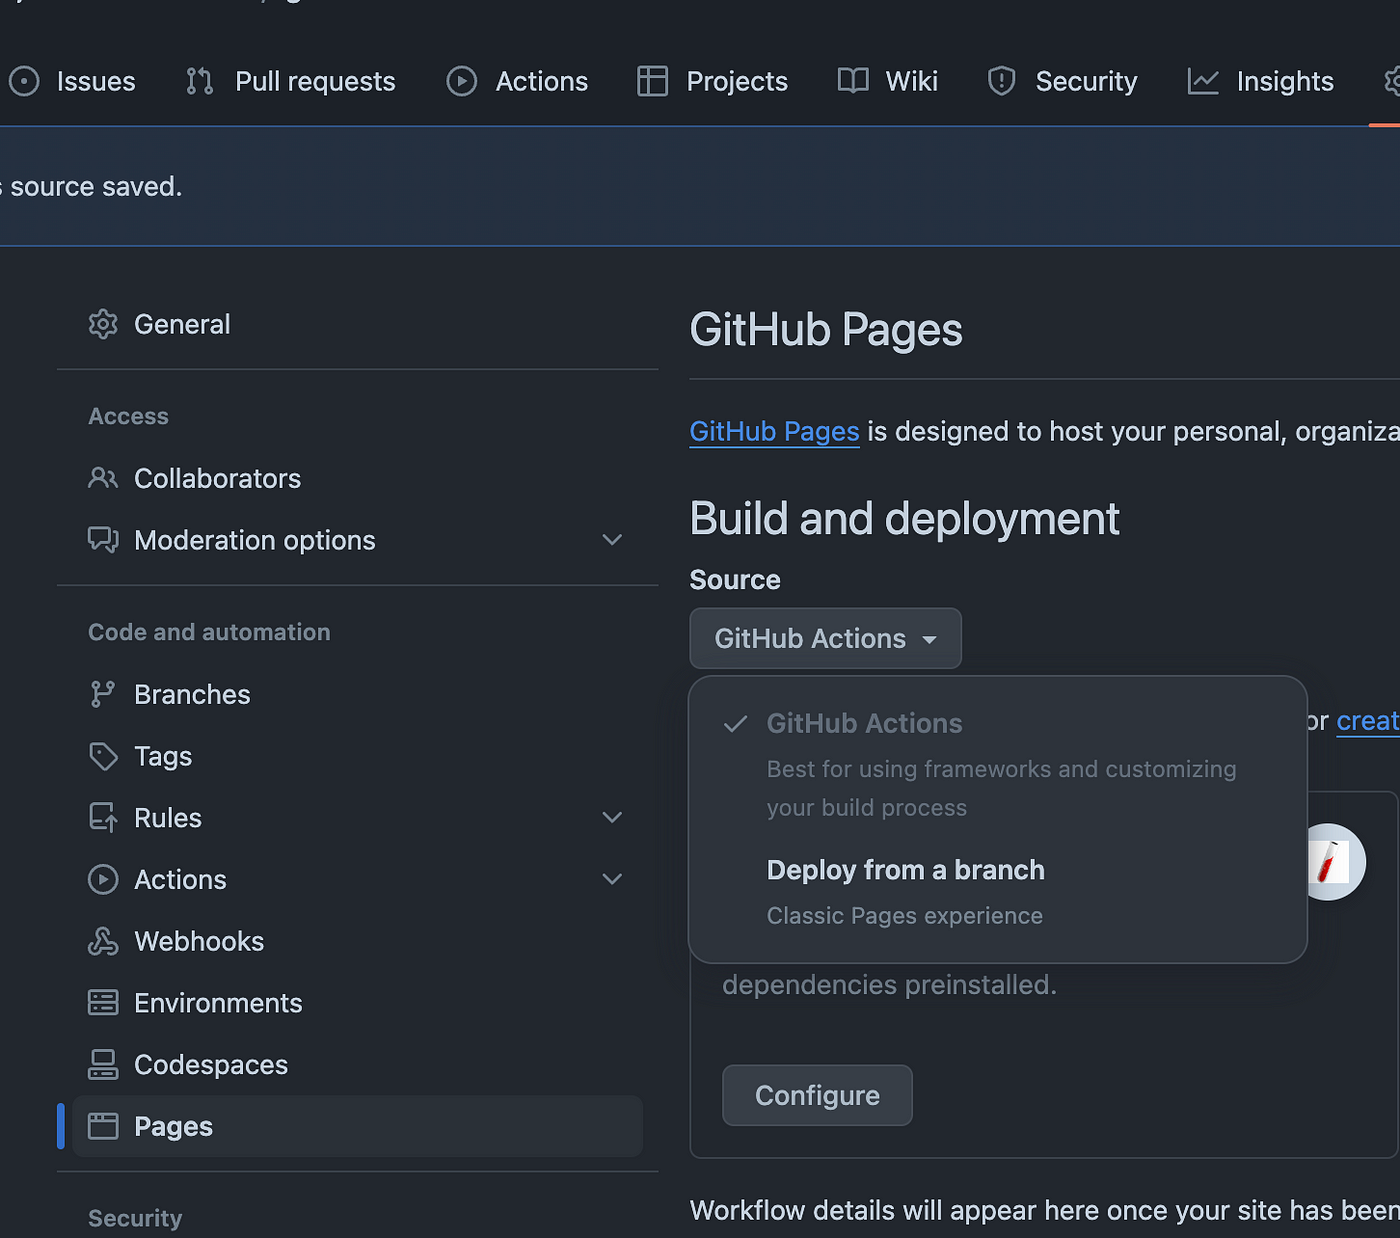
Create an empty repository, and within the repo settings, make sure the following options are checked:
- Settings > Pages: Build and deployment to Github Pages is done from “GitHub Actions”
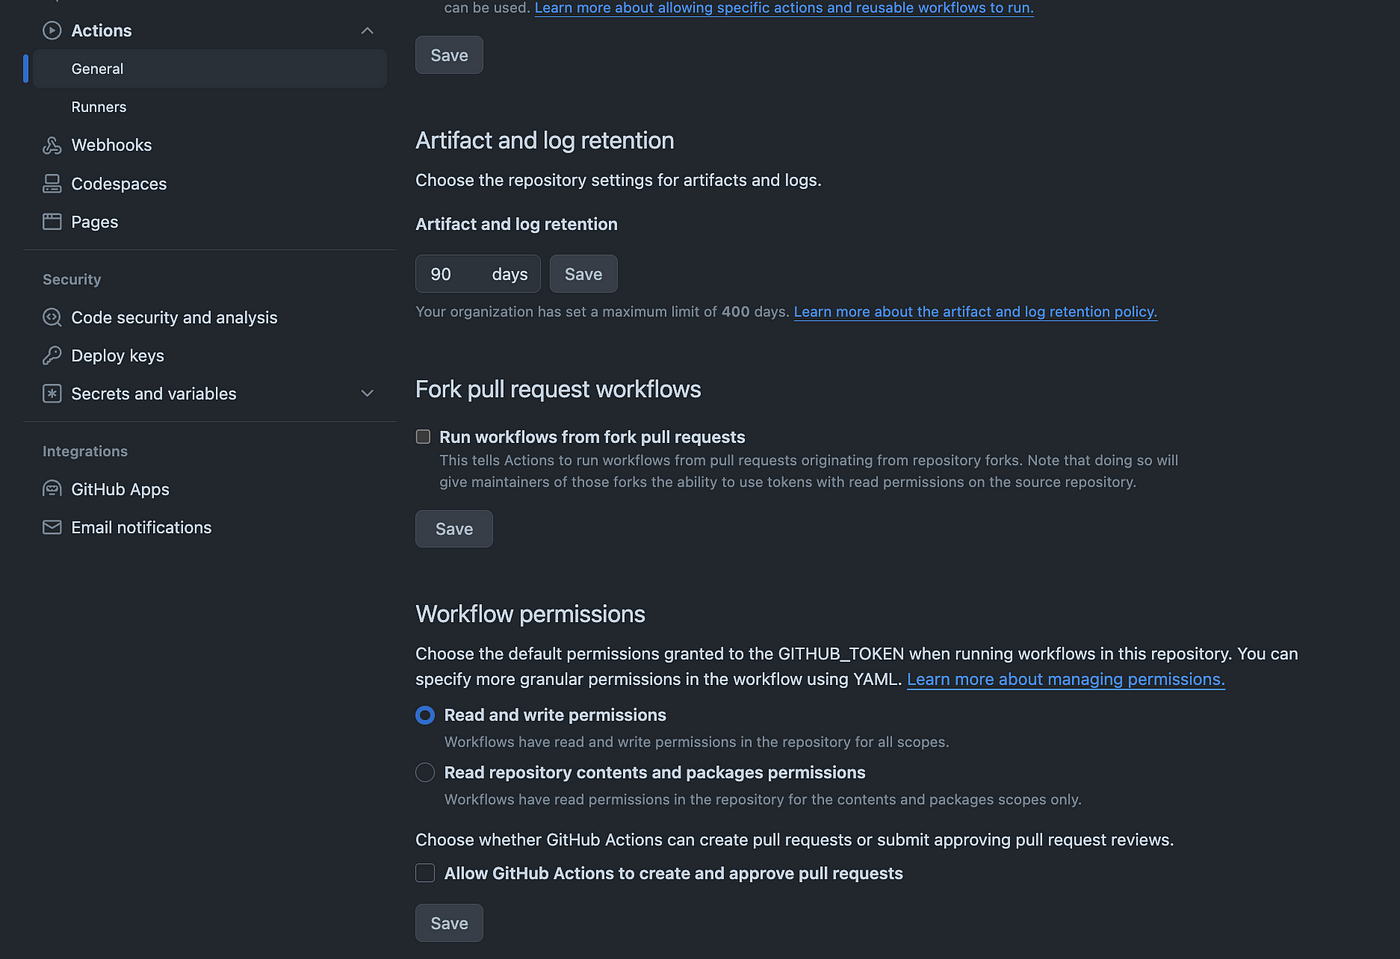
- Actions > General: “Allow all actions and reusable workflows”

- and that your workflows have read and write permissions (in the same Actions/general tab)
Setting up the project locally
After creating the repository, create the project locally and link it to the remote. I will use pnpm as my package manager and run the react-ts template from Vite to bootstrap the project.
sudo npm i -g pnpm //install pnpm
pnpm --version // check version, if retrieved installed properly
pnpm create vite my-demo-app --template react-ts
cd my-demo-app
pnpm install
pnpm pkg set 'packageManager'='pnpm@'$(pnpm --version) // set pnpm current version as the package manager
git init
git remote add origin .... // use your link from GitHub
git add .
git commit -m "initial commit"
git push -u origin main
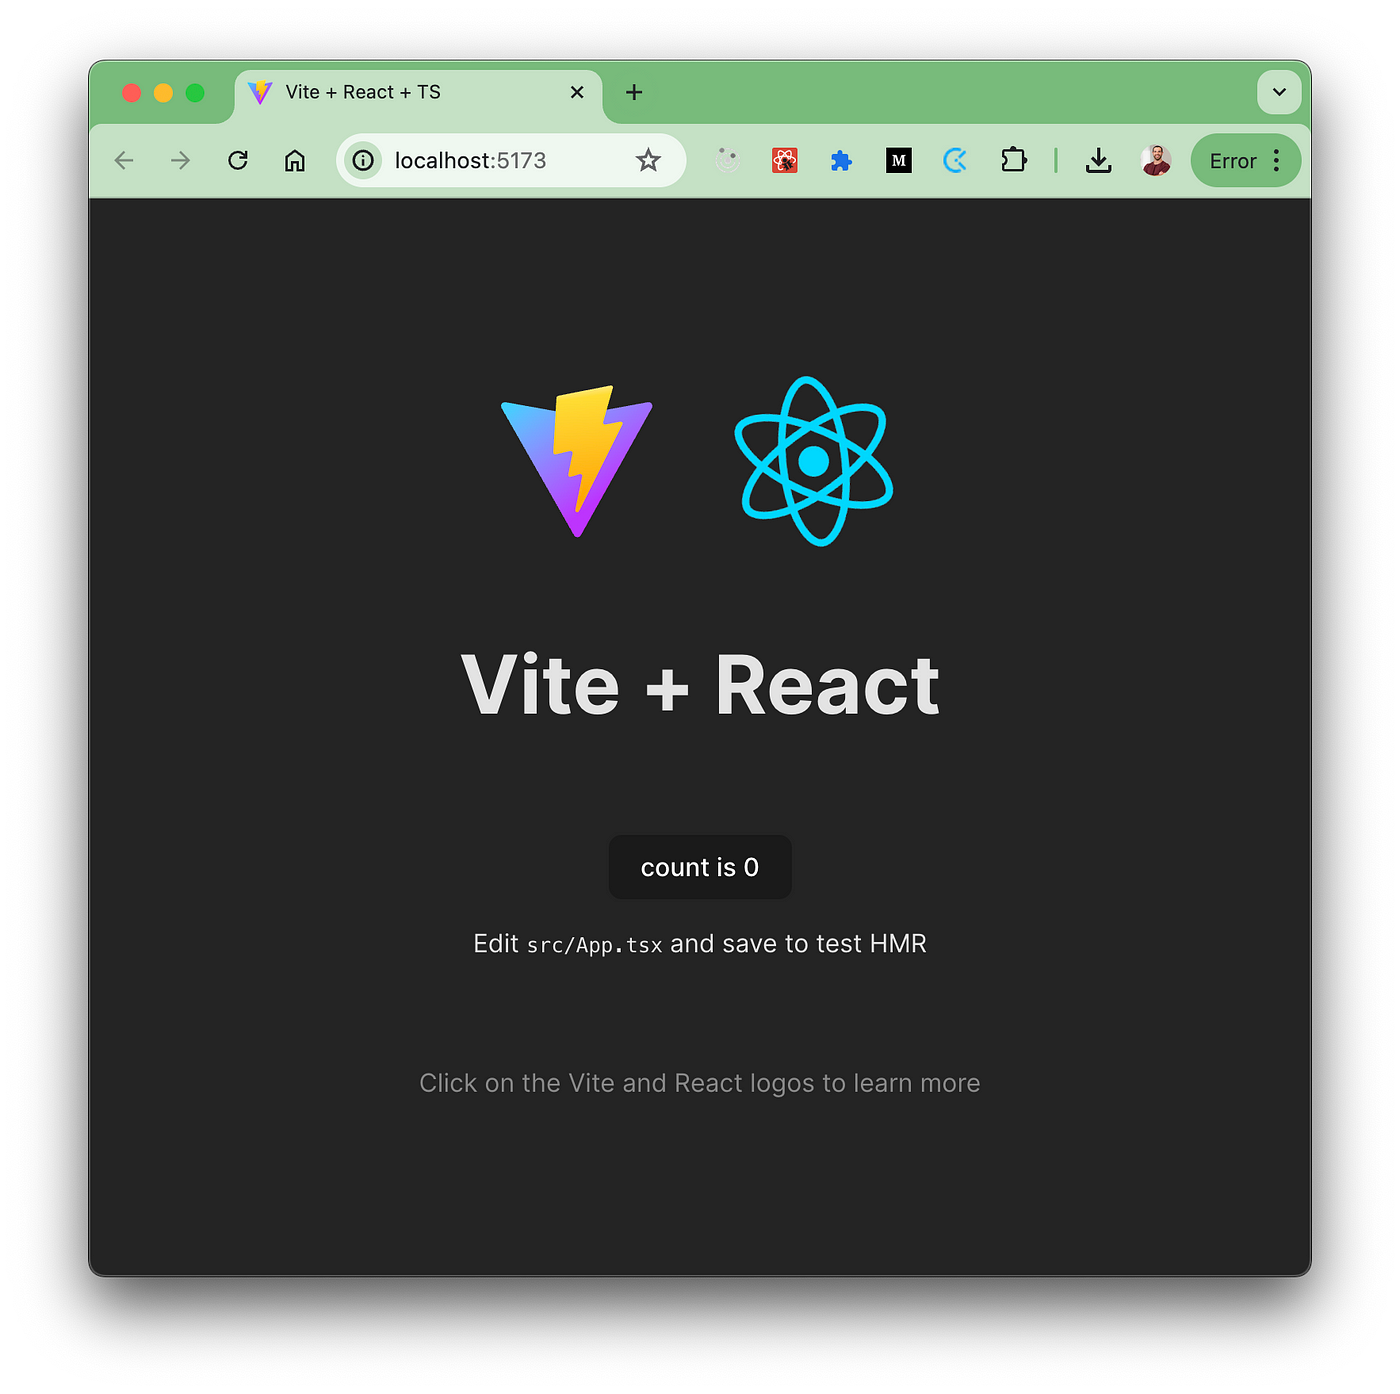
pnpm run devAt this point, you should already have a running application locally:
Adding Jest and setting up tests
Many articles cover setting up Jest with Vite to test React applications using TypeScript. I won’t delve into the details here, but in short, you need to:
- Install the following dependencies — Jest as the test runner, React Testing Library as the test framework, some transformers for file extensions like CSS or SVG, and a Jest and Node transformer —
pnpm add -D \
  @testing-library/jest-dom \
  @testing-library/react \
  @types/jest \
  identity-obj-proxy \
  jest \
  jest-environment-jsdom \
  jest-transformer-svg \
  ts-jest \
ts-node- Add a test script:
pnpm pkg set 'scripts.test'='jest'- Tweak all the configurations needed to make it work by checking this commit (talk is cheap; show me the code)
- Run:
pnpm run test- And enjoy watching your tests pass (for now, dun dun dun)

Hands-on the GitHub Worfklow
First, add your repo's name to the base property within your vite.config file. For example, if my repo is https://github.com/jonatankruszewski/gh-actions-vite-ts-jest, then in base I would need to add '/gh-actions-vite-ts-jest/'.
//vite.config.ts
import { defineConfig } from 'vite'
import react from '@vitejs/plugin-react'

// https://vitejs.dev/config/
export default defineConfig({
  plugins: [react()],
  base: '/gh-actions-vite-ts-jest/'
})
Then, let’s create the deploy workflow that will run with GitHub Actions. Let’s not forget that it should be stored inside the .github/workflows folder. We will call this file deploy.yml.
mkdir -p .github/workflows && cd $_ && touch deploy.ymlIn our deploy.yml file, we will place the following:
name: Deploy to GitHub Pages
on:
  push:
    branches:
      - main
  workflow_dispatch:
jobs:
  test:
    runs-on: ubuntu-latest
    steps:
      - name: Checkout
        uses: actions/checkout@v4.1.7
      - name: Install pnpm
        uses: pnpm/action-setup@v4
        with:
          version: 9.5.0
      - name: install Nodejs
        uses: actions/setup-node@v3
        with:
          node-version: 20
          cache: 'pnpm'
      - name: Install dependencies
        run: pnpm install
      - name: Run tests
        run: pnpm test

  build:
    runs-on: ubuntu-latest
    needs: test
    steps:
      - name: Checkout
        uses: actions/checkout@v4.1.7
      - name: Install pnpm
        uses: pnpm/action-setup@v4
        with:
          version: 9.5.0
      - name: install Nodejs
        uses: actions/setup-node@v3
        with:
          node-version: 20
          cache: 'pnpm'
      - name: Install dependencies
        run: pnpm install
      - name: Build project
        run: pnpm run build
      - name: Upload production-ready build files
        uses: actions/upload-pages-artifact@v3
        with:
          name: github-pages
          path: ./dist

  deploy:
    needs: build
    runs-on: ubuntu-latest
    if: github.ref == 'refs/heads/main'

    permissions:
      pages: write
      contents: write
      id-token: write
      actions: read

    environment:
      name: github-pages
      url: ${{ steps.deployment.outputs.page_url }}

    steps:
      - name: Download artifact
        uses: actions/download-artifact@v4
        with:
          name: github-pages
          path: ./dist
      - name: Deploy to GitHub Pages
        id: deployment
        uses: actions/deploy-pages@v4
Understanding the workflow file
The workflow file contains three jobs: test, build, and deploy. Each job runs on a different machine and needs to perform the same steps, such as checking out the code, installing dependencies, and so on. Three jobs, three computing instances.
These jobs would run in parallel by default, but we want each to run only after the previous one finishes. That is the reason we have the depends property.
Each job contains a series of steps. Since they are run on different machines, we must download the code, install the dependencies, and so on every time. That is why the checkout action, for example, is used three times. We could have used a composite action to remove the duplicated declarations, but let’s keep it this way for now.
Since the machines are different, once the build finishes its part, we need to publish the artifact to consume it later. This is done with the upload—download artifact action. Actually, here we are using a more apt option for publishing to GitHub Pages, called upload-pages-artifact.
So, if you’ve reached this point where you set up the repo, testing and yml file, after pushing the changes, you should see something like this:
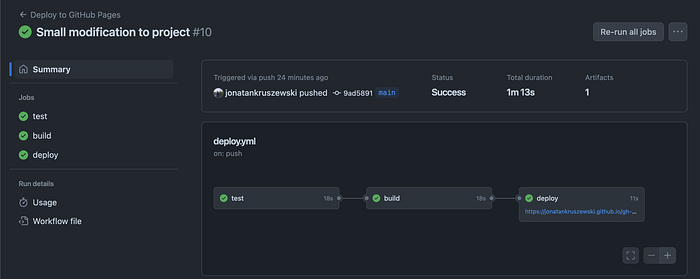
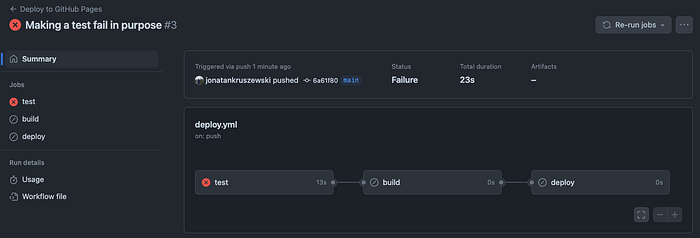
Failing a test skips the build and deploy jobs as intended:
Wrapping Up
We deployed a Vite React TypeScript app to GitHub Pages. We used GitHub Actions, Jest, and pnpm. We set up proper CI/CD practices, like avoiding deployment if the tests fail and caching dependencies.
A plus of GitHub Actions is that it brings the pipeline to the repo level, making it easier for developers to configure it. Now it is easier than ever to keep our app in a deployable state without depending so much on a DevOps team.
Happy coding!